Nowadays, 3MA is well accepted in industrial production and material research. A broad range of different applications on different components of ferromagnetic materials has been developed based on the 3MA NDT technique, applications overview ranging from magnetic microscopes with um resolution up to large inspection systems for in-line strip steel inspection.
More than three decades ago, at Fraunhofer IZFP, research activities that were related to the application of micromagnetic methods for nondestructive testing (NDT) of the microstructure and the properties of ferrous materials commenced. Soon, it was observed that it is beneficial to combine the measuring information from several micromagnetic methods and measuring parameters. This was the birth of 3MA—the micromagnetic multi-parametric microstructure and stress analysis. Since then, 3MA has undergone a remarkable development. It has proven to be one of the most valuable testing techniques for the nondestructive characterization of metallic materials. Nowadays, 3MA is well accepted in industrial production and material research.
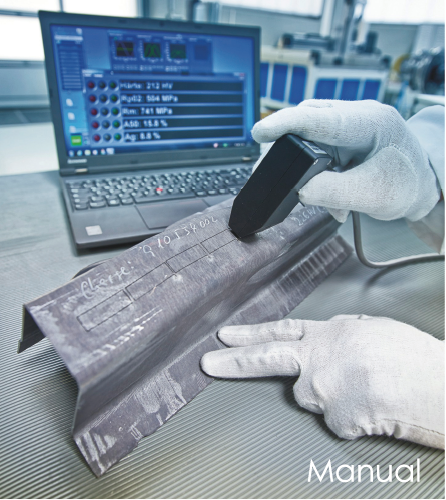
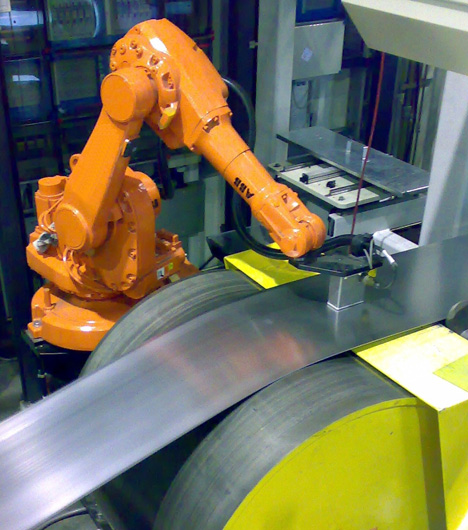
Over the years, several equipment variants and a wide range of probe heads have been developed, ranging from magnetic microscopes with m resolution up to large inspection systems for in-line strip steel inspection. 3MA NDT technique is extremely versatile, as proved by a huge amount of reported applications, such as the quantitative determination of hardness, hardening depth, residual stress, and other material parameters. Today, specialized 3MA systems are available for manual or automated testing of various materials, semi-finished goods, and final products that are made of steel, cast iron, or other ferromagnetic materials.
|
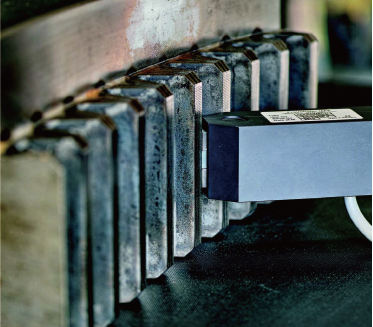
3MA Technique: combines 4 kinds of micromagnetic nondestructive testing methods |
3MA NDT Software - One of the quantitative results display interface |
Meanwhile, a broad range of different applications on different components of ferromagnetic materials has been developed based on the 3MA approach. Table below summarizes these applications. Subsequently, some of the main important 3MA applications will be described in more detail.
| No. | Component | Main Application/Description |
| 1 | Components in nuclear power plants | Materials damage and degradation; Neutron-induced embrittlement |
| 2 | Welds (laser, etc.), turbine blades, bearing rings, etc. | Hardness and residual stress |
| 3 | Machined parts (gear wheels, etc.) | Thermally induced material damage due to machining |
| 4 | Surface hardened or nitrated parts | Hardening depth, depth profiles of hardness and residual stress, retained austenite content |
| 5 | Steel grades | Classification of steel grades and microstructure variants |
| 6 | Cast iron | Residual stress, cementite content, primary chill, microstructure gradient |
| 7 | Strip steel | Mechanical properties, microstructure features (texture, grain size) and residual stress |
| 8 | Heavy plate and forged parts | Mechanical properties, microstructure features, residual stress, hard spots |
| 9 | Cold formed steel sheets | Residual stress and spring back angle |
| 10 | Hot formed steel sheets | Mechanical properties of steel, coating thickness, resistance spot weld size |
| 11 | Electrical steel | Inspection of cut edges; cutting quality |
| 12 | Miscellaneous | Hydrogen-induced embrittlement, fatigue, toughness, notch impact strength, creep damage |
One of the earliest applications of 3MA was the inspection of components in nuclear power plants. Such components are subjected to different ageing phenomena. For the steel components in the reactor pressure vessel, heat exchangers, pipe lines, etc., the main important aging phenomena are thermal ageing, fatigue, and neutron embrittlement. In the past, it was shown that 3MA is an important tool in evaluating material degradation due to ageing in such components. Besides neutron degradation, the superimposed impact from thermal ageing and low-cycle fatigue was investigated. In the case of austenitic stainless steels when exposed to mechanical static or cyclic loads, the material reacts with local phase transformations to generate bcc martensite. 3MA can also detect such local martensite.
The nondestructive determination of hardness and residual stress distribution in the weld seam and in the heat-affected zone of welded components was another early 3MA application. Later, 3MA was applied to determine the hardness and residual stress in heat-treated (turbine blades) or grinded components (e.g., bearing rings). Another well-developed 3MA application is the determination and characterization of grinding damage (“grinding burns”). 3MA is able to determine the depth-profiles of hardness, residual stress, and retained austenite in surface-hardened components. The classification tasks can also be solved with 3MA NDT Technique.
Besides steel, cast iron is another material that can be characterized with 3MA. In other section we describes the 3MA applications on strip steel in detail. For thin strip, heavy plate, and large forged steel components, 3MA is mainly used to determine the parameters of the tensile test, e.g., tensile strength Rm and yield strength Rp0.2. In further processing, when the steel sheets are cold or hot formed, 3MA is used for determining the mechanical properties and also the residual stress or spring back angle. An interesting application of 3MA is the determination of electromagnetic properties (e.g., iron losses, maximum induction) in electrical steel, because 3MA is able to locally determine these properties, which is not possible with Epstein frames, etc. Furthermore, 3MA can be used to characterize hydrogen-induced embrittlement, fatigue, toughness, notch impact strength, and creep damage in steel.

|

|

|
|
The fundamental idea behind 3MA was born more than three decades ago. The main 3MA principle, i.e., the multiparametric approach, is based on the combination of measuring information from several micromagnetic methods and several measuring parameters. This allows for avoiding measuring ambiguities and offering the possibility to not only detect qualitative changes, but also to determine the quantitative values of the target quantities. The combined methods differ in their interaction mechanisms and interaction depths, and therefore their combination allows for the influence of disturbances (e.g., temperature, batch variations) to be minimized and different material depths to be sampled at once. The method combination is crucial in achieving correct and reliable results in the application of 3MA micromagnetic methods. Without this approach, the 3MA technique would not be so accepted in this dimension in research and industry.
3MA was successfully used to quantitatively determine hardness, hardening depth, residual stress, parameters of static and dynamic tests (tensile, bending, fatigue, creep, impact testing), and microstructure features (texture, cementite, retained austenite). Meanwhile, some applications have been developed to an impressively high degree of technical maturity. Today, specialized 3MA systems are available for the testing of semi-finished products, such as strip steel and heavy plates, as well as all types of ferromagnetic steel or cast iron components, such as cold- or hot-formed parts, machined (milled, turned, grinded, etc.) parts, and heat-treated (through, induction, case hardened, etc.) parts.
-Excerpt from the article [Nondestructive Testing with 3MA—An Overview of Principles and Applications]

311,Building 5,No.81,Meiyue Road,Waigaoqiao Free Trade Zone,Pudong,Shanghai,China
amy@labgages.com
021-50473900


About LAB | Cooperative Brand | Contact us | Sitemap

滬公網(wǎng)安備 31011502000213號(hào)

 滬ICP備12021537號(hào)-1
©2012-2024 LAB GAGES